
To use an air compressor with a paint sprayer, connect the sprayer to the compressor and adjust the pressure. Ensure the compressor’s CFM rating matches the sprayer’s requirements.
Spray painting with an air compressor offers a smooth, professional finish. Proper setup is crucial for optimal results. Start by selecting an air compressor compatible with your paint sprayer. Check the compressor’s CFM (cubic feet per minute) rating to ensure it meets the sprayer’s needs.
Attach the sprayer to the compressor with a suitable air hose. Adjust the pressure regulator to the recommended PSI (pounds per square inch) for your paint type. Always use a moisture trap to prevent water from mixing with the paint. Proper setup ensures efficient, high-quality painting.

Introduction To Spray Painting
Spray painting transforms surfaces quickly and efficiently. It delivers a smooth finish that brushes and rollers can’t match. This technique is useful for a variety of projects, from small crafts to large walls.
Why Choose Spray Painting?
Spray painting offers many advantages over traditional methods. Here are some reasons why you should consider it:
- Speed: Cover large areas faster than with a brush.
- Uniform Finish: Provides a smooth and even coat.
- Versatility: Suitable for various surfaces and materials.
Benefits Of Using An Air Compressor
An air compressor enhances the spray painting process. It ensures consistent pressure and better paint flow. Below are the key benefits:
| Benefit | Description |
|---|---|
| Consistent Pressure | Makes sure the paint is applied evenly. |
| Efficiency | Reduces the time needed to complete projects. |
| Quality Finish | Achieves a professional look with less effort. |
Using an air compressor with a paint sprayer can make your projects easier and more effective. It saves time and delivers a high-quality finish. This combination is perfect for both beginners and professionals.
Selecting The Right Air Compressor
Choosing the right air compressor for your paint sprayer is crucial. It affects the quality of your paint job. Below, we guide you through selecting the perfect air compressor.
Types Of Air Compressors
There are several types of air compressors. Each has its own advantages and disadvantages. Here are the most common types:
- Pancake Compressors: These are compact and portable. Ideal for small projects.
- Hot Dog Compressors: They have a horizontal design. They offer more air capacity than pancake compressors.
- Twin-Stack Compressors: These have two air tanks. They provide a continuous air supply.
- Wheelbarrow Compressors: These are heavy-duty. Perfect for large projects needing high air volume.
- Stationary Compressors: These are large and powerful. Best for professional and industrial use.
Key Features To Consider
When selecting an air compressor, consider these key features:
| Feature | Description |
|---|---|
| CFM (Cubic Feet per Minute) | Indicates the compressor’s air output. Higher CFM means more air delivery. |
| PSI (Pounds per Square Inch) | Measures the air pressure. Higher PSI is needed for thicker paints. |
| Tank Size | Determines how long you can spray without stopping. Larger tanks offer longer spray times. |
| Portability | Consider if you need to move the compressor around. Smaller, lightweight models are easier to transport. |
| Noise Level | Some compressors are quieter than others. Look for models with lower decibel ratings if noise is a concern. |
By evaluating these features, you can select the best air compressor for your paint sprayer. This ensures smooth and efficient operation.
Choosing The Ideal Paint Sprayer
Choosing the ideal paint sprayer is crucial for achieving a flawless finish. The right sprayer can make your painting project efficient and enjoyable. Let’s explore the different types of paint sprayers and their compatibility with air compressors.
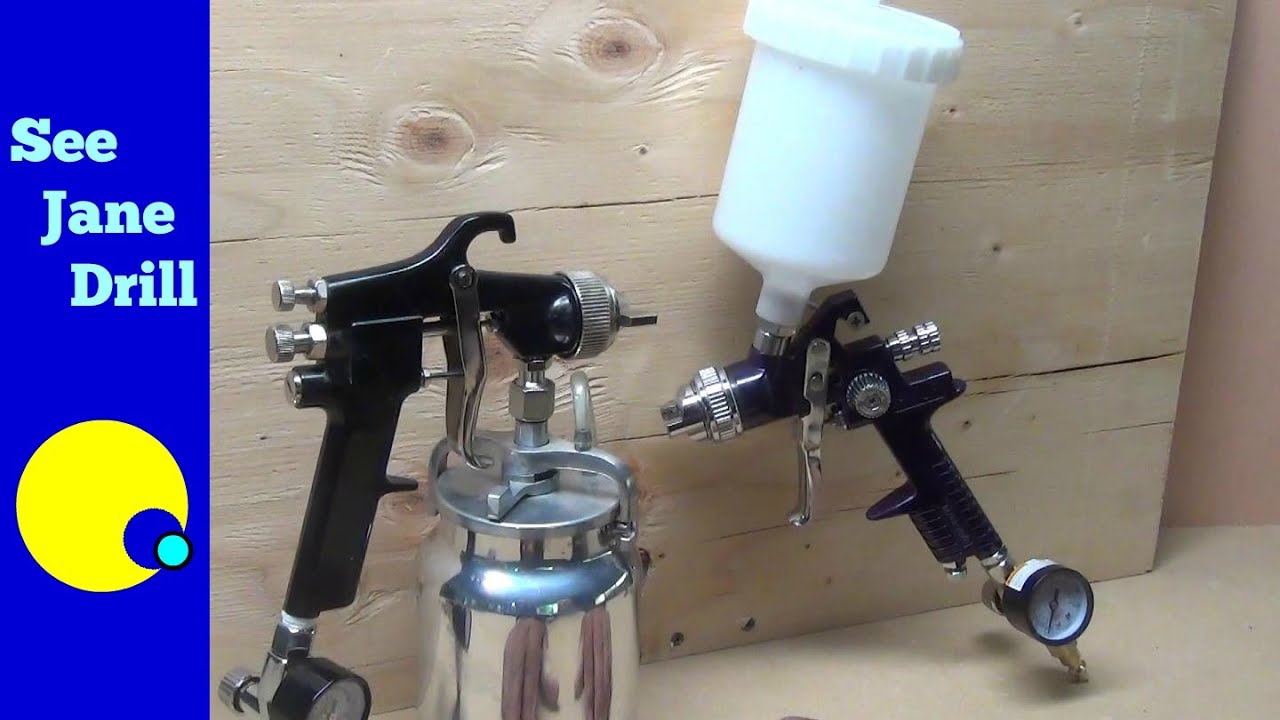
Different Types Of Paint Sprayers
There are several types of paint sprayers available. Each one has its unique features and benefits. Here’s a breakdown of the most common types:
| Type | Features | Best For |
|---|---|---|
| HVLP (High Volume Low Pressure) | Low overspray, fine finish | Detail work, small projects |
| Airless Sprayers | High pressure, fast coverage | Large areas, exterior painting |
| Compressed Air Sprayers | Even application, versatile | Indoor projects, cabinets, furniture |
Compatibility With Air Compressors
Not all paint sprayers work with all air compressors. It’s important to check compatibility. Here are key factors to consider:
- CFM (Cubic Feet per Minute): Ensure the compressor’s CFM matches the sprayer’s requirements.
- PSI (Pounds per Square Inch): Check that the sprayer operates within the compressor’s PSI range.
- Tank Size: A larger tank allows for continuous spraying without interruptions.
Choosing the right combination of paint sprayer and air compressor can make your painting project a success. Always refer to the manufacturer’s specifications to ensure compatibility and optimal performance.
Preparing Your Workspace
Getting ready to use an air compressor with a paint sprayer? It starts with preparing your workspace. A well-organized and safe space ensures a smooth painting process. Here’s how to do it right.
Safety Measures
Safety is the top priority. Follow these steps to stay safe:
- Wear protective gear: Use gloves, goggles, and a mask.
- Ventilate the area: Open windows and use fans.
- Clear flammable items: Remove anything that can catch fire.
- Check for leaks: Ensure there are no air or paint leaks.
Organizing Your Tools
Keep your tools in order. This makes the job easier and faster:
- Gather all tools: Have the air compressor, paint sprayer, and accessories ready.
- Lay out materials: Place paint cans, stir sticks, and drop cloths nearby.
- Use a tool rack: Hang tools for easy access.
- Label items: Mark tools and parts clearly.
| Tool | Purpose |
|---|---|
| Air Compressor | Provides the air pressure |
| Paint Sprayer | Applies the paint |
| Hose | Connects the compressor and sprayer |
| Protective Gear | Ensures safety |
By following these steps, your workspace will be ready. You can then focus on creating a beautiful paint job.
Setting Up The Air Compressor
Spray painting with an air compressor can provide smooth and professional results. Setting up your air compressor correctly ensures a perfect finish. Follow these steps to get started.
Connecting Hoses And Fittings
First, gather all necessary hoses and fittings. Ensure they are compatible with your air compressor and paint sprayer.
- Attach the air hose to the compressor outlet.
- Securely connect the other end to the paint sprayer.
- Use thread seal tape on the fittings to prevent leaks.
Check all connections. Make sure they are tight and secure. This ensures consistent air pressure for painting.
Adjusting Pressure Settings
Proper pressure settings are crucial for a smooth paint job. Too high or low pressure can affect the paint finish.
- Turn on the air compressor.
- Locate the pressure regulator knob.
- Adjust the pressure to the recommended PSI for your paint sprayer. This information can be found in the sprayer’s manual.
Use a pressure gauge to verify the settings. Make sure it stays constant during the painting process.
| Component | Action |
|---|---|
| Hoses and Fittings | Connect securely, use thread seal tape |
| Pressure Settings | Adjust to recommended PSI, use gauge |
With the air compressor set up, you are ready to start painting. Follow these steps for a flawless finish.
Mixing And Preparing Paint
Mixing and preparing paint is a crucial step in achieving a smooth and professional finish. The right mixture ensures even application and prevents clogs in the sprayer. Follow these steps to get the best results.
Choosing The Right Paint
Choosing the right paint is essential for spray painting. Use paints specifically designed for spray application. Some common options include:
- Acrylic Paints
- Lacquers
- Enamels
Check the paint label for compatibility with air compressors and sprayers.
Thinning And Straining Paint
Thinning and straining paint ensures smooth flow through the sprayer. Thick paint can clog the nozzle and ruin your work.
- Thinning Paint: Use the right thinner as per paint type. Common thinners include water for latex and mineral spirits for oil-based paints.
- Straining Paint: Pour paint through a paint strainer or cheesecloth. This removes lumps and debris.
Here’s a table for quick reference:
| Paint Type | Thinner |
|---|---|
| Latex | Water |
| Oil-based | Mineral Spirits |
Proper thinning and straining ensure a flawless finish.
Techniques For Effective Spray Painting
Mastering spray painting with an air compressor requires skill and practice. This guide will help you achieve professional results. Follow these techniques for a smooth and even finish.
Test Spraying
Before starting your project, it’s vital to test spray on a piece of cardboard or scrap material. This helps you adjust the spray pattern and pressure.
- Set up your air compressor and paint sprayer.
- Fill the paint sprayer with the desired paint.
- Adjust the air pressure according to the paint type.
- Hold the sprayer 6-12 inches from the test surface.
- Press the trigger and move the sprayer in a steady motion.
Make sure the spray pattern is even and the paint flow is consistent. Adjust settings if necessary until you achieve the desired results.
Achieving Even Coats
To get a smooth and even coat, follow these steps:
- Prepare the surface: Clean and sand the surface to ensure the paint adheres properly.
- Use the right technique: Hold the sprayer at a consistent distance from the surface.
- Maintain steady movement: Move the sprayer in a consistent, sweeping motion.
- Overlap each pass: Overlap each pass by 50% to avoid streaks and achieve even coverage.
- Apply thin coats: Apply multiple thin coats instead of one thick coat to prevent drips and runs.
Allow each coat to dry before applying the next. This ensures a smooth, even finish and reduces the risk of defects.
| Step | Description |
|---|---|
| 1 | Prepare the surface |
| 2 | Use the right technique |
| 3 | Maintain steady movement |
| 4 | Overlap each pass |
| 5 | Apply thin coats |
Cleaning And Maintenance
Cleaning and maintaining your air compressor and paint sprayer is essential. Proper care ensures longevity and optimal performance of your equipment. A well-maintained setup delivers consistent, professional results. Follow these steps to keep your tools in top shape.
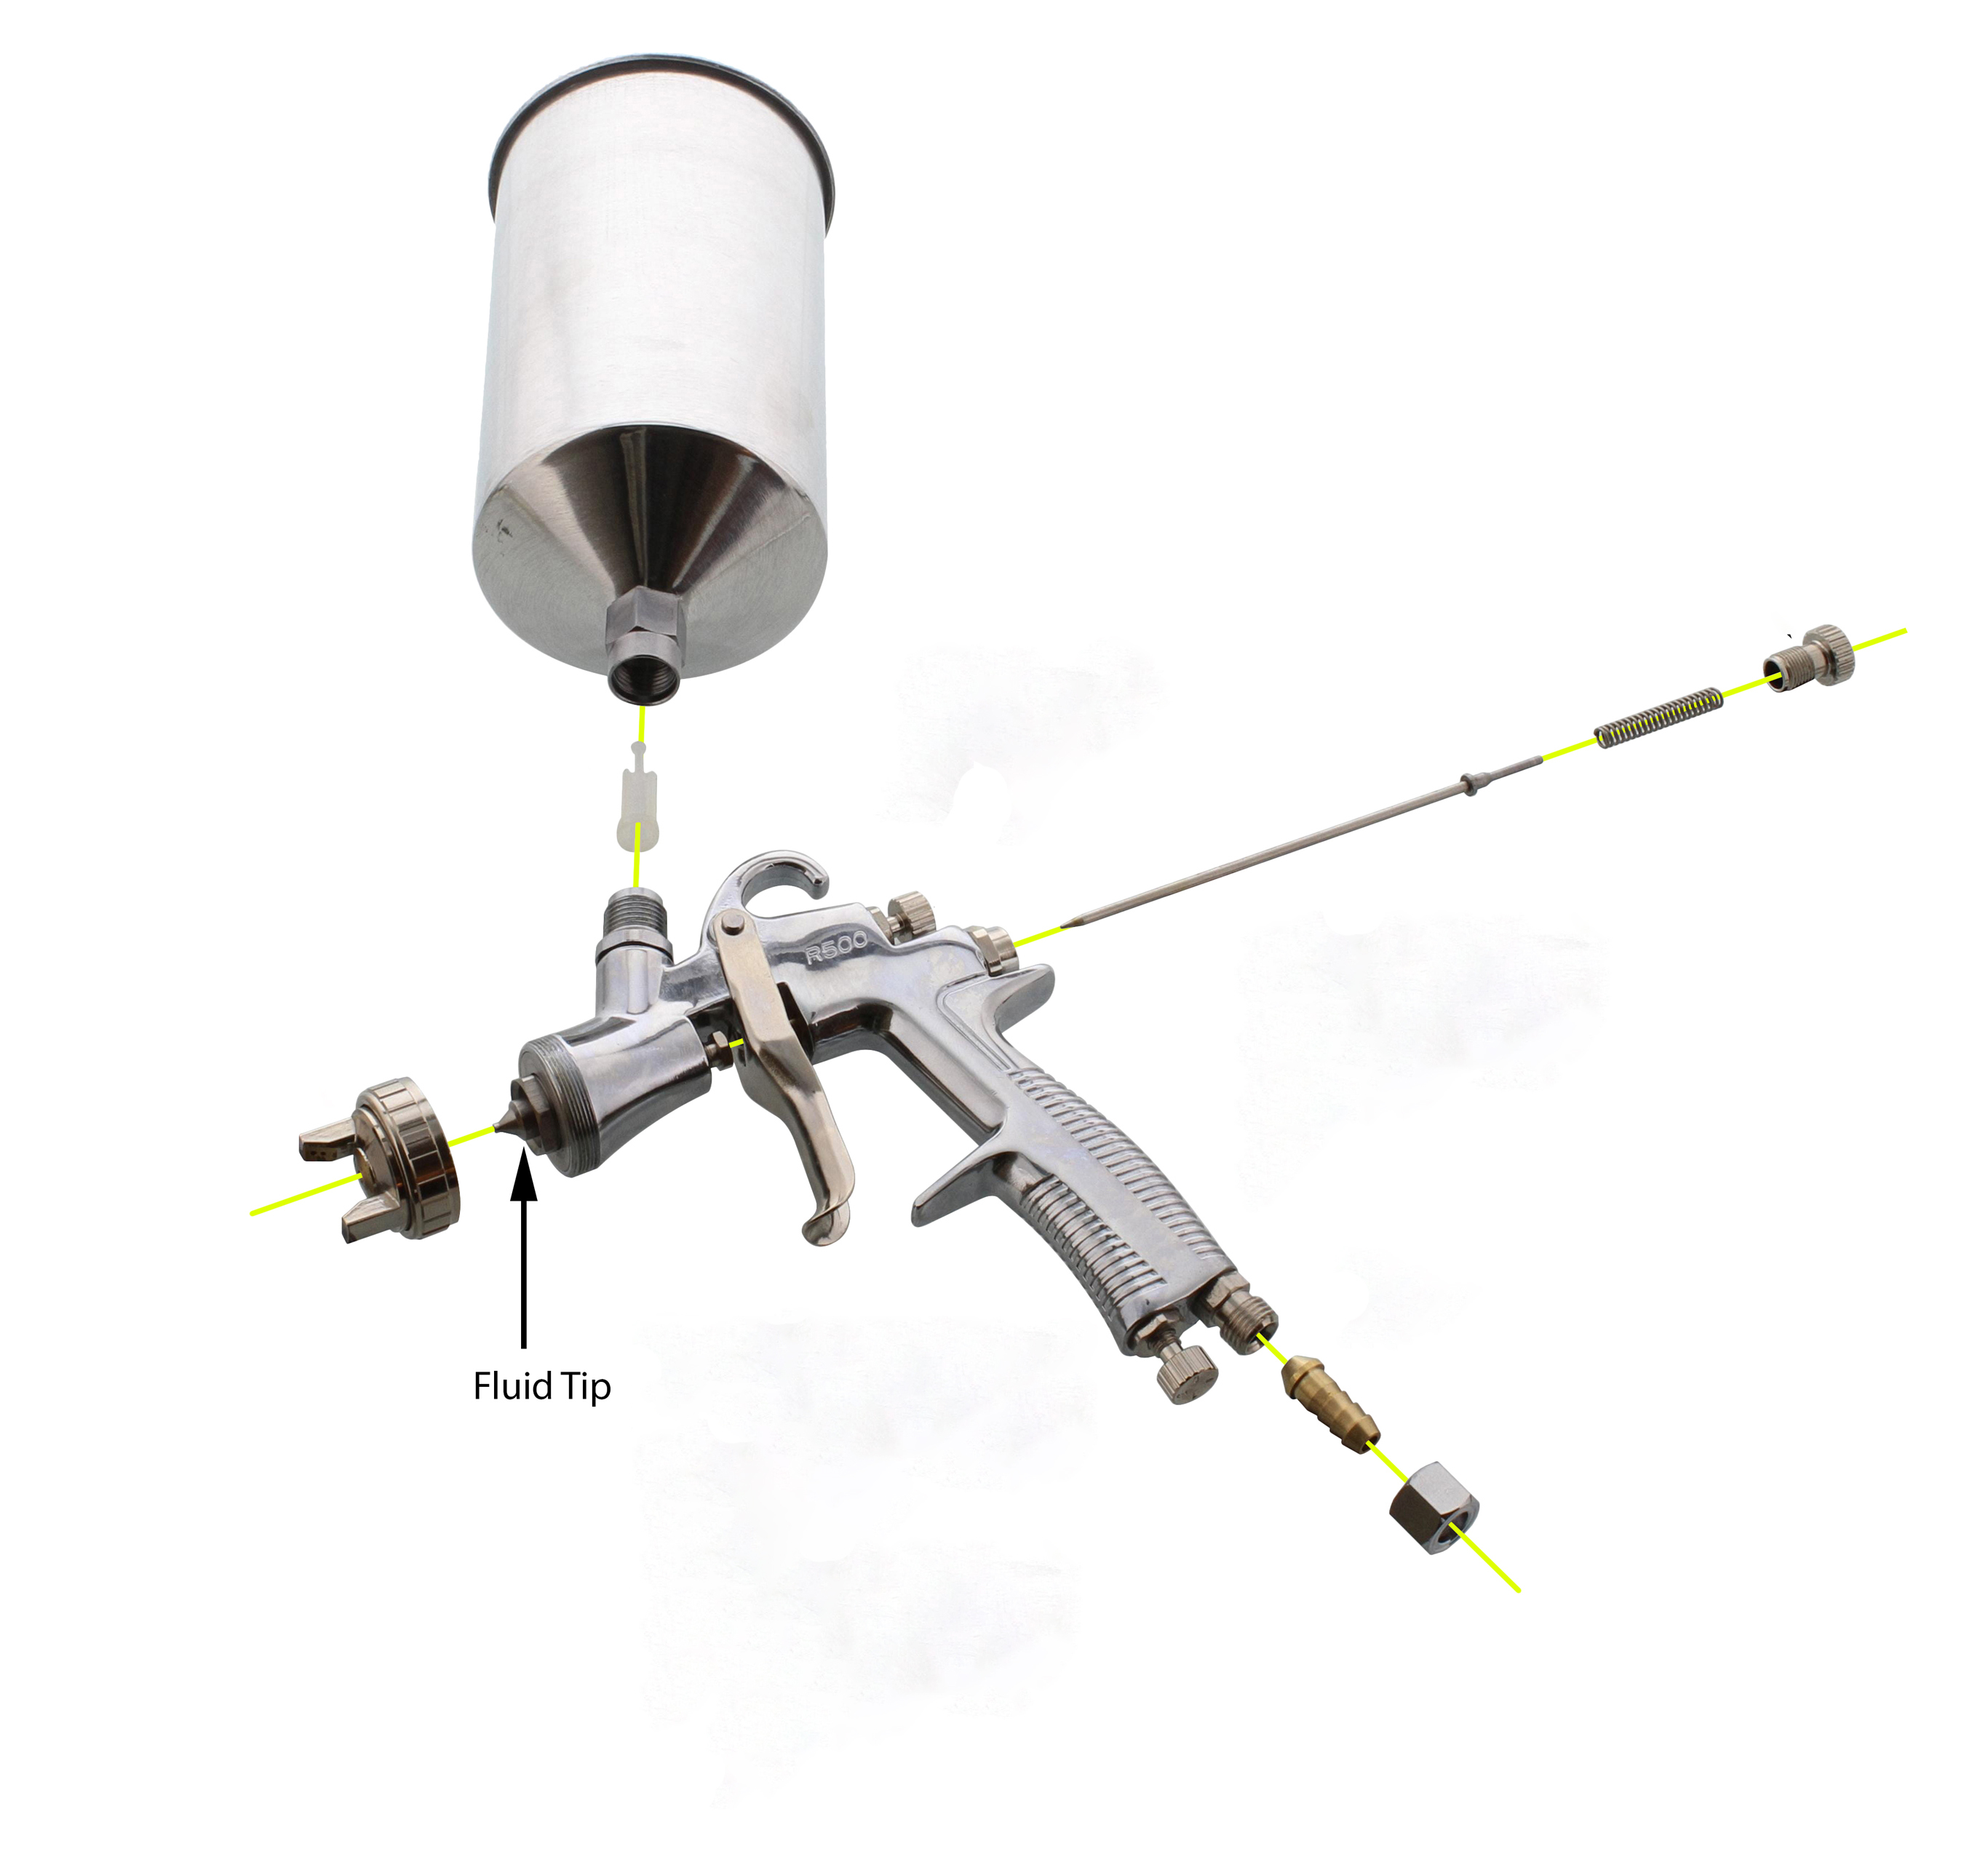
Cleaning The Paint Sprayer
After each use, clean the paint sprayer to prevent clogs. Start by detaching the sprayer from the air compressor. Disassemble the sprayer parts as per the manufacturer’s instructions. Rinse each part with warm water to remove paint residues. Use a brush to scrub areas with dried paint. For stubborn spots, soak the parts in water for a few minutes. Reassemble the sprayer after drying all parts thoroughly.
| Step | Action |
|---|---|
| 1 | Detach the sprayer from the air compressor |
| 2 | Disassemble the sprayer parts |
| 3 | Rinse each part with warm water |
| 4 | Scrub areas with dried paint |
| 5 | Soak stubborn spots in water |
| 6 | Dry and reassemble the sprayer |
Maintaining The Air Compressor
Maintaining the air compressor ensures smooth operation. Regularly check the compressor’s oil level and refill if necessary. Drain the air tank after each use to prevent moisture buildup. Inspect hoses and connections for leaks or wear. Replace damaged parts immediately to avoid performance issues.
- Check the oil level regularly
- Refill oil if necessary
- Drain the air tank after each use
- Inspect hoses and connections
- Replace damaged parts
Keep the air intake filter clean. A clogged filter reduces efficiency. Clean or replace the filter as recommended by the manufacturer. Store the air compressor in a dry, cool place. This prevents rust and other damage.
Common Troubleshooting Tips
Using an air compressor with a paint sprayer can sometimes be tricky. You might face issues like clogs or uneven paint flow. This section offers common troubleshooting tips to ensure a smooth painting experience.
Dealing With Clogs
Clogs are a common issue in paint sprayers. They can cause the paint to spit or not spray at all. Here are some tips for dealing with clogs:
- Clean the Nozzle: Remove the nozzle and clean it with a brush.
- Filter the Paint: Use a strainer to remove particles from the paint.
- Check the Air Pressure: Ensure the air pressure is correct for your paint type.
Ensuring Smooth Paint Flow
Smooth paint flow is essential for a professional finish. Follow these steps to ensure your paint flows smoothly:
- Adjust the Pressure: Set the compressor to the recommended pressure for your paint sprayer.
- Thin the Paint: If the paint is too thick, thin it according to the manufacturer’s instructions.
- Test Spray: Always do a test spray on a scrap surface to check the flow.
Remember, keeping your equipment clean and well-maintained will reduce most issues. Happy painting!
Conclusion And Final Thoughts
Using an air compressor with a paint sprayer can save time and effort. It is essential to set up your equipment correctly for optimal results. This guide has covered the critical aspects of using an air compressor for spray painting. Read on for a summary and some final thoughts to encourage your DIY projects.
Summary Of Key Points
- Select the right air compressor for your paint sprayer.
- Ensure the air pressure matches the requirements of your sprayer.
- Use a regulator to control the air pressure accurately.
- Check for leaks in hoses and connections.
- Maintain a clean work area to avoid dust and debris.
- Practice proper safety measures while operating the equipment.
Encouragement For Diy Projects
DIY projects can be rewarding and fun. Using an air compressor with a paint sprayer can achieve professional results. Don’t be afraid to try new techniques and improve your skills.
Start with small projects to gain confidence. Gradually move on to more complex tasks. Remember to be patient and enjoy the process.
Refer back to this guide whenever you need a refresher. Happy painting!
Frequently Asked Questions
How Do You Set Up An Air Compressor For Spray Painting?
To set up an air compressor for spray painting, connect the air hose to the compressor. Attach the other end to the paint sprayer. Adjust the pressure settings according to the paint manufacturer’s recommendations.
What Size Air Compressor Is Needed For Spray Painting?
For spray painting, a compressor with a minimum 20-gallon tank is ideal. It should have a 2-3 horsepower motor and a CFM rating of 4-6.
How Do You Adjust Air Pressure For A Paint Sprayer?
To adjust air pressure for a paint sprayer, use the regulator on the air compressor. Start with the recommended PSI from the paint manufacturer. Fine-tune for optimal spray.
Can You Use Any Paint With An Air Compressor?
No, not all paints are suitable for use with an air compressor. Use paints specifically designed for spray painting. Check the label for compatibility.
Conclusion
Mastering the use of an air compressor with a paint sprayer boosts your painting projects. Follow the setup steps carefully for smooth results. Ensure regular maintenance for optimal performance. Happy painting and enjoy your flawless finishes!