Changing an air conditioner compressor involves disconnecting the power, removing the old unit, and installing a new one. Always consult a professional for safe and efficient replacement.
Replacing an air conditioner compressor can seem daunting, but it’s a crucial maintenance task. A faulty compressor affects cooling efficiency and can lead to higher energy bills. Understanding the process helps homeowners make informed decisions. Regular maintenance extends the lifespan of your air conditioning system.
Signs of a failing compressor include strange noises, refrigerant leaks, and inconsistent cooling. Knowing when to replace the compressor prevents further damage to your system. This guide will walk you through the steps and considerations involved in the replacement process. Stay cool and comfortable by ensuring your air conditioning system runs optimally year-round.
Credit: www.youtube.com
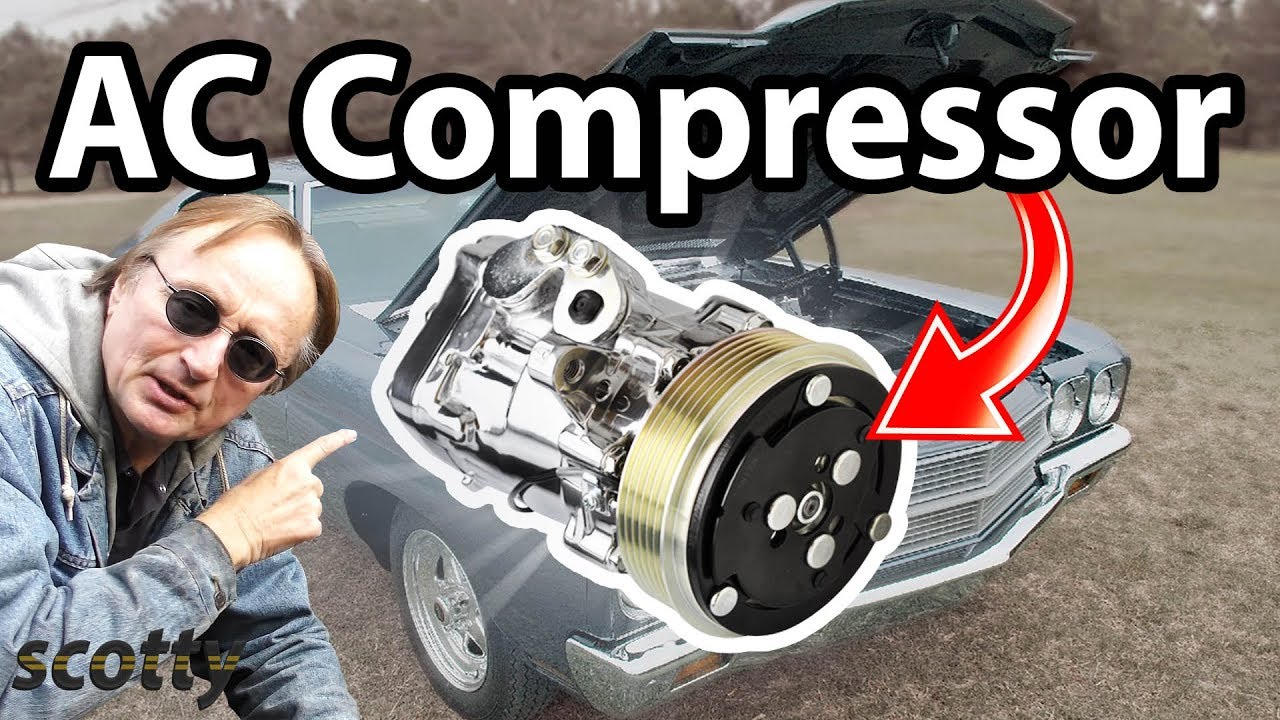
Introduction To Ac Compressor Replacement
Replacing your air conditioner’s compressor can feel daunting. Understanding when and why to change it is essential. The compressor is crucial for cooling your home. A faulty compressor can lead to discomfort and higher energy bills.
Signs Your Compressor Needs Changing
- Unusual Noises: Grinding or clanking sounds indicate problems.
- Inconsistent Cooling: Rooms may feel warm, despite the AC running.
- Frequent Cycling: The unit turns on and off often.
- Increased Energy Bills: Notice a sudden spike in costs.
- Overheating: The compressor may feel hot to the touch.
Impact Of A Faulty Compressor On Ac Performance
A faulty compressor can severely affect your AC. It leads to:
| Impact | Description |
|---|---|
| Poor Cooling | Inability to maintain comfortable temperatures. |
| Increased Wear | Other components may wear out faster. |
| Higher Repair Costs | Fixing other issues can become expensive. |
| Energy Inefficiency | Higher electricity consumption. |
Addressing compressor issues quickly prevents larger problems. Regular maintenance helps extend the lifespan of your AC unit.
Credit: atlasacrepair.com
Tools And Materials Required
Replacing an air conditioner compressor requires specific tools and materials. Having the right items ensures a smooth process. This section covers essential tools and safety gear needed for the job.
Essential Tools For The Job
Here is a list of essential tools for changing an air conditioner compressor:
- Socket Set – Needed for removing bolts.
- Wrench Set – Useful for tightening and loosening fittings.
- Screwdriver Set – Required for various screws in the unit.
- Refrigerant Recovery Machine – Important for handling refrigerant safely.
- Manifold Gauge Set – Essential for checking pressure levels.
- Vacuum Pump – Used to remove air and moisture from the system.
- Torque Wrench – Ensures bolts are tightened to specifications.
- Pipe Cutter – Needed for cutting refrigerant lines.
Safety Equipment And Precautions
Safety is crucial during this process. Use the following safety equipment:
| Safety Equipment | Purpose |
|---|---|
| Safety Glasses | Protects eyes from debris. |
| Gloves | Prevents cuts and chemical burns. |
| Face Mask | Reduces inhalation of harmful chemicals. |
| Steel-Toe Boots | Protects feet from heavy equipment. |
Follow these precautions:
- Disconnect power before starting.
- Release refrigerant properly.
- Work in a well-ventilated area.
- Check for leaks after installation.
Using the right tools and safety equipment ensures a successful compressor change.
Preparation Steps
Changing an air conditioner compressor requires careful preparation. Proper steps ensure safety and efficiency. Follow these guidelines to prepare effectively.
Powering Down And Safety Measures
Before starting any work, safety is crucial. Follow these steps:
- Turn off the power: Locate the main power switch for the unit.
- Disconnect the power supply: Unplug the air conditioner from the outlet.
- Wear safety gear: Use gloves and goggles for protection.
- Check for leaks: Inspect for any refrigerant leaks around the unit.
These measures help prevent accidents and injuries.
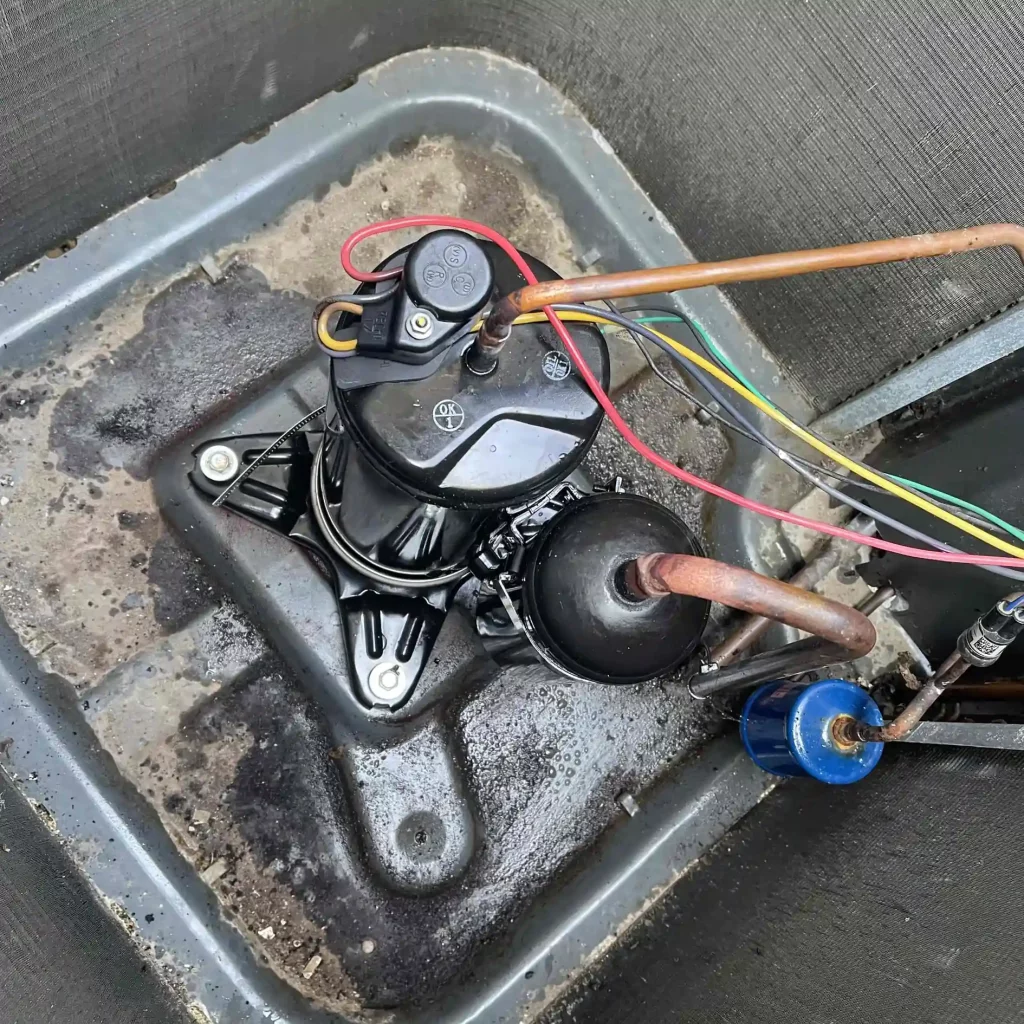
Accessing The Compressor
Gaining access to the compressor is essential. Follow these steps:
- Remove the front panel of the air conditioner.
- Locate the compressor, usually found at the back.
- Carefully detach any wires connected to the compressor.
- Unscrew the mounting bolts holding the compressor in place.
Make sure to keep all screws in a safe place. This helps during reinstallation.
Credit: m.youtube.com
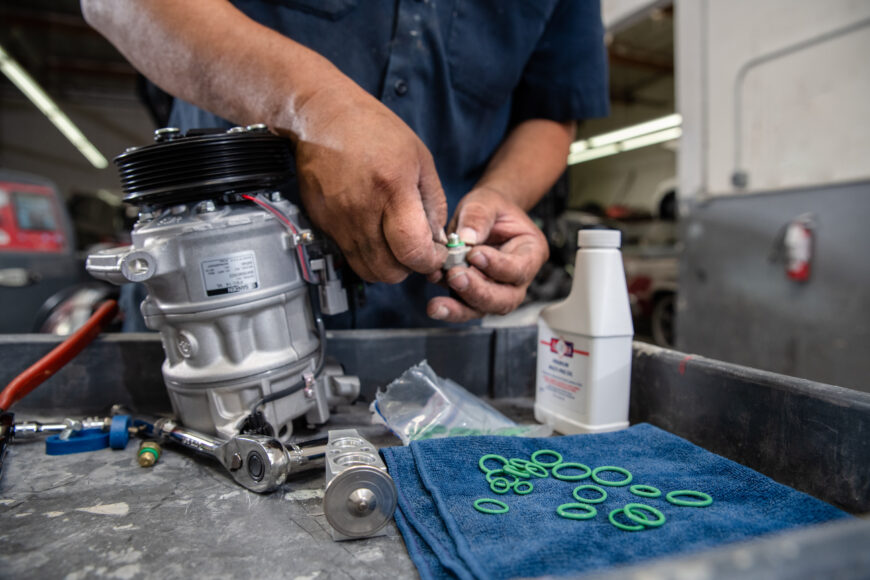
Removing The Old Compressor
Removing the old compressor is a crucial step in air conditioner maintenance. It requires careful handling and proper technique. This ensures safe removal without damaging other components.
Detaching Connections And Fittings
Start by turning off the power to the air conditioner. Safety is the top priority. Follow these steps to detach connections:
- Locate the access panel on the outdoor unit.
- Remove screws holding the panel in place.
- Disconnect the electrical wires. Use a screwdriver to loosen terminals.
- Detach the refrigerant lines carefully.
Use appropriate tools like wrenches for the refrigerant lines. Avoid damaging any fittings during this process. Label each connection for easier reassembly.
Handling Refrigerant And Legal Considerations
Refrigerant handling is critical for safety and legality. Follow these guidelines:
- Always wear safety goggles and gloves.
- Use a recovery machine to capture refrigerant.
- Check local laws on refrigerant disposal.
Improper handling can harm the environment. Ensure you have the proper certifications to handle refrigerants.
Consult a professional if uncertain about any step. This can save time and prevent accidents.
Choosing The Right Replacement
Replacing an air conditioner compressor is crucial for efficiency. The right replacement ensures optimal cooling. Many options exist, making choices overwhelming. Focus on compatibility and quality for best results.
Compatibility And Specifications
Compatibility is key when selecting a new compressor. Ensure the replacement fits your unit’s model. Check these specifications:
| Specification | Importance |
|---|---|
| Model Number | Matches your existing unit |
| Horsepower | Should match the original compressor |
| Refrigerant Type | Must be compatible with your system |
| Electrical Ratings | Must fit your electrical system |
Always refer to the owner’s manual for precise details. Using the wrong compressor can cause failures.
Benefits Of Quality Aftermarket Compressors
Choosing high-quality aftermarket compressors offers many advantages:
- Cost-effective: Often cheaper than OEM options.
- Improved Performance: Many outperform original parts.
- Availability: Easier to find and purchase.
- Warranty: Many come with warranties for peace of mind.
Investing in a quality aftermarket compressor enhances your AC’s lifespan. It ensures reliability during hot weather. Look for trusted brands with positive reviews.
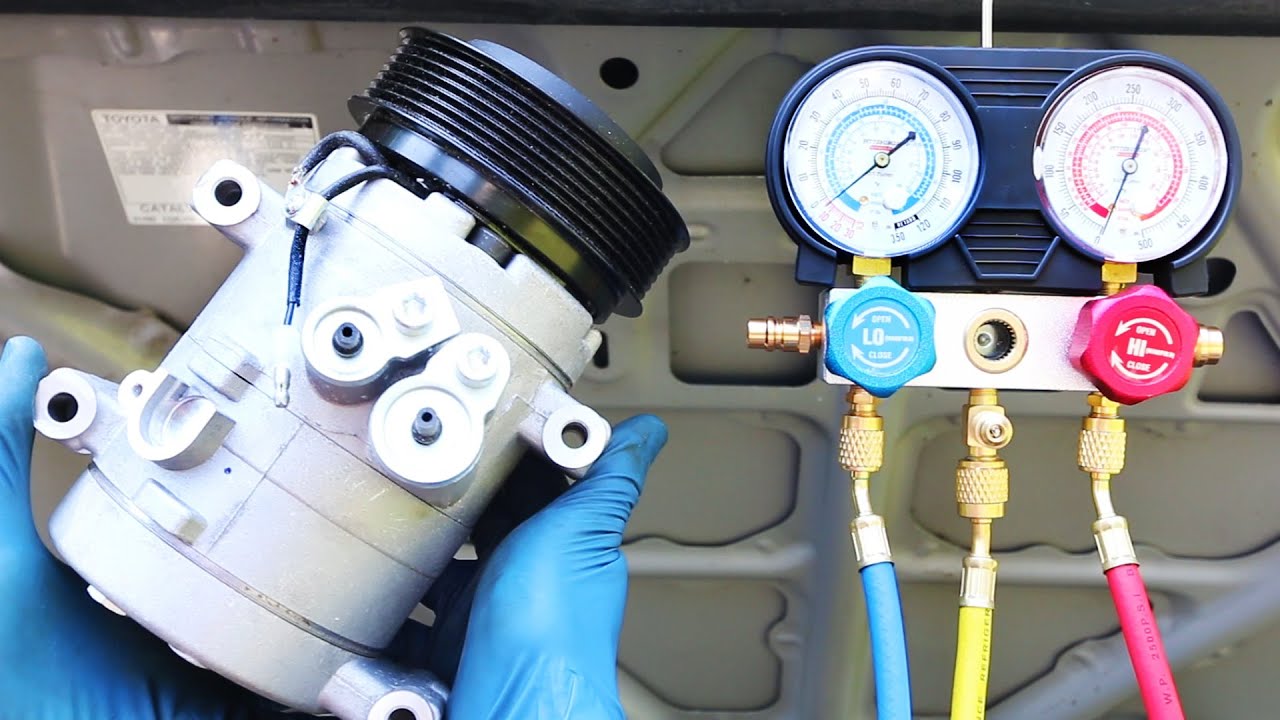
Installing The New Compressor
After removing the old compressor, it’s time to install the new one. This process involves careful handling and precise steps. Follow these guidelines to ensure a successful installation.
Securing The Compressor In Place
Begin by placing the new compressor into the designated mounting area. Use the following steps to secure it:
- Align the compressor with the mounting brackets.
- Insert the bolts into the brackets.
- Tighten the bolts using a wrench.
- Ensure the compressor is level and stable.
Check for any vibrations. A well-secured compressor reduces noise and improves performance.
Reattaching Electrical And Refrigerant Lines
Next, reattach the electrical and refrigerant lines. Follow these steps carefully:
- Locate the electrical connectors on the compressor.
- Connect the wires, ensuring correct polarity.
- Secure the connections with electrical tape.
For the refrigerant lines, do the following:
- Align the refrigerant lines with the compressor ports.
- Use a wrench to tighten the fittings securely.
- Check for leaks by using a leak detector.
Proper reattachment ensures efficient cooling and prevents leaks.
Testing And Troubleshooting
After changing your air conditioner compressor, testing is crucial. Proper testing ensures your system works well. Troubleshooting can help identify issues quickly.
Initial System Checks
Start with these basic checks:
- Check the power supply. Ensure the unit is connected.
- Inspect the thermostat settings. Set it to cool mode.
- Look for unusual noises. Listen for rattling or grinding sounds.
- Check the refrigerant level. Low refrigerant can cause problems.
Use a multimeter to test electrical connections. This helps find faulty components.
| Component | Possible Issue | Solution |
|---|---|---|
| Capacitor | Not starting | Replace the capacitor |
| Contactor | Not engaging | Test and replace if faulty |
| Refrigerant Line | Leaking | Seal leaks and recharge refrigerant |
Common Issues After Replacement
After replacing the compressor, watch for these common issues:
- Inadequate Cooling: This may signal low refrigerant.
- Frequent Cycling: The unit may turn on and off often.
- Increased Energy Bills: A faulty compressor can waste power.
Inspect connections and wiring. Ensure everything is secure. Call a technician for persistent issues.
Maintenance tips To Prolong Compressor Life
Keeping your air conditioner compressor in good shape is crucial. Regular maintenance helps prevent costly repairs. Follow these tips to extend its lifespan.
Regular Maintenance Schedule
Establish a routine maintenance schedule. This ensures your compressor runs efficiently. Here are some key tasks:
- Check filters monthly. Clean or replace them as needed.
- Inspect the coils for dirt. Clean them to improve airflow.
- Examine the refrigerant levels. Ensure they are at the correct level.
- Clean the drain line. This prevents water buildup.
- Schedule professional inspections annually.
Early Detection Of Potential Problems
Spotting issues early can save money. Look out for these signs:
| Problem | Signs | Action |
|---|---|---|
| Unusual Noises | Hissing or clanking sounds | Check for loose parts |
| Inconsistent Cooling | Hot spots in rooms | Inspect ductwork and filters |
| Increased Energy Bills | Higher than usual costs | Evaluate efficiency and schedule a check |
| Frequent Cycling | Turns on and off rapidly | Examine thermostat settings |
Address these issues promptly. This keeps your compressor healthy. Proper care leads to better performance and lower energy costs.
Professional Help Vs. Diy
Deciding whether to hire a professional or tackle a DIY project can be challenging. Changing an air conditioner compressor is a critical task. Understanding the pros and cons of each option helps make the right choice. Here, we explore when to call a professional and how to assess DIY complexity.
When To Call A Professional
Some situations require expert help. Here are key reasons to consider:
- Lack of Experience: If you have never worked on HVAC systems.
- Safety Concerns: Handling refrigerants can be dangerous.
- Complex Systems: Modern units often have complicated setups.
- Warranty Issues: DIY repairs may void your warranty.
Professionals can ensure the job is done correctly. They have tools and knowledge to handle potential problems. This saves time and prevents costly mistakes.
Assessing The Complexity Of Diy Replacement
Evaluate your skills and tools before starting. Consider the following:
| Skill Level | Required Tools | Time Commitment |
|---|---|---|
| Beginner | Basic tools only | 2-4 hours |
| Intermediate | Specialized tools | 4-8 hours |
| Advanced | Full HVAC toolkit | 8+ hours |
Ask yourself these questions:
- Do I have the right tools?
- Can I follow technical instructions?
- Am I comfortable with electrical components?
Understanding your limits is crucial. A DIY project can turn into a headache without the right skills.
Frequently Asked Questions
How Do I Know If My Compressor Is Bad?
Signs of a failing compressor include unusual noises, insufficient cooling, and frequent cycling. You may also notice warm air blowing from vents. If the compressor runs continuously without cooling, it’s likely time for a replacement. Consult a professional for a thorough diagnosis to confirm the issue.
What Is The Average Cost To Replace A Compressor?
The cost to replace an air conditioner compressor typically ranges from $1,200 to $2,500. Factors influencing the price include the brand, model, and labor costs. Additional expenses may arise if other components need replacement. It’s advisable to get multiple quotes from licensed HVAC technicians for the best deal.
Can I Replace The Compressor Myself?
While it’s technically possible to replace the compressor yourself, it’s not recommended. The process involves handling refrigerants, which require specialized knowledge and tools. Incorrect installation can lead to further damage or safety hazards. Hiring a qualified technician ensures proper installation and compliance with local regulations.
How Long Does A Compressor Last?
A well-maintained air conditioner compressor can last between 10 to 15 years. Factors affecting its lifespan include usage, maintenance, and environmental conditions. Regular servicing can extend its longevity, while neglect can lead to premature failure. Always monitor the performance to catch issues early.
Conclusion
Changing your air conditioner compressor is essential for optimal performance. Regular maintenance can extend the life of your unit. Always consider professional help for this task. A well-functioning compressor ensures a comfortable indoor environment. Stay proactive with your HVAC system to avoid costly repairs in the future.
Enjoy cool, refreshing air all summer long!