Absolutely! Here is a comprehensive, publication-ready article on “Air Compressor for Auto Detailing under $250 for DIY Projects,” expanded in detail with clear explanations, practical advice, and relevant examples. The structure and headings are preserved and every section is proportionally expanded.
—
Air Compressor For Auto Detailing Under $250 For Diy Projects
Auto detailing at home is becoming more popular. Many car owners want to keep their vehicles looking new, but professional detailing can be expensive. An air compressor is a useful tool for many car cleaning tasks, like blowing out dust, drying, cleaning seats, or even running small air tools.
But choosing the right air compressor under $250 can be confusing, especially for beginners. Let’s break down everything you need to know so you can make a smart choice for your DIY projects.
Why Use An Air Compressor For Auto Detailing?
Using an air compressor gives your car a professional finish. It can help you clean areas you can’t reach with a cloth or vacuum. For example, air can blow dust and debris out of air vents, door jams, seat tracks, and under the seats.
It also helps dry wet areas quickly after cleaning carpets or seats, which prevents mold and bad smells.
Many detailers also use air compressors with tools like a Tornador cleaning gun or a small pneumatic polisher. These tools need compressed air to work. Even if you only use the compressor to blow away dust or dry tight spots, you’ll get much better results than with just brushes and towels.
Not every compressor is good for detailing. Some are too loud, some too weak, and some too large for home garages. If you pick the right one, you’ll save time, energy, and get a cleaner car.
Key Features To Look For
When shopping for an air compressor for auto detailing under $250, focus on these main factors:
1. Tank Size
The tank holds compressed air, so you don’t need to run the motor all the time. For DIY detailing, a tank size between 2 and 6 gallons is usually enough. A small tank (like 2–3 gallons) is lighter and easier to move, but it empties faster if you use tools that need a lot of air.
A 6-gallon tank lasts longer, but the compressor will be a bit heavier.
For example, if you only blow dust out of vents, a 2-gallon tank might be enough. But if you use a Tornador or air-driven brush, you’ll want 4–6 gallons. Anything bigger is often too heavy and expensive for home use.
2. Airflow And Pressure (cfm And Psi)
CFM means “cubic feet per minute. ” It measures how much air the compressor can deliver. PSI means “pounds per square inch,” which is the air pressure. Most detailing tools need about 2–4 CFM at 40–90 PSI.
Many budget compressors list their maximum PSI, but CFM is more important. For example, a small compressor might reach 120 PSI but only deliver 1. 5 CFM at 90 PSI, which is not enough for tools like the Tornador. Always check the CFM rating at 40 or 90 PSI, not just the max PSI.
A good choice is a compressor that gives at least 2. 0 CFM at 90 PSI for basic tasks. For more demanding tools, aim for 3. 0 CFM or higher.
3. Portability And Noise
Auto detailing often means moving around your car. A portable compressor is easier to carry or roll around the garage. Look for models with handles and wheels. Weight is important too—if you have to lift it often, lighter is better.
Noise matters, especially if you detail in a small garage or live in an apartment. Many budget compressors are loud (80 dB or more). If you have neighbors or want to work early or late, look for “quiet” or “low-noise” models (under 70 dB if possible).
4. Power Source
Most home compressors plug into a standard wall outlet (120V). This is fine for garages or driveways. If you want to detail your car away from home, look for models that work with a car battery or have a 12V option, but these are usually weaker.
5. Build Quality And Warranty
Cheaper compressors sometimes use plastic parts that break easily. Check reviews for complaints about leaks, overheating, or failing motors. A good warranty (at least 1 year) is helpful. Some brands are known for better support and parts.
6. Accessories Included
Some compressors come with extra hoses, blow guns, or nozzles. These add value, but make sure the main unit is good quality. You can always buy accessories later.
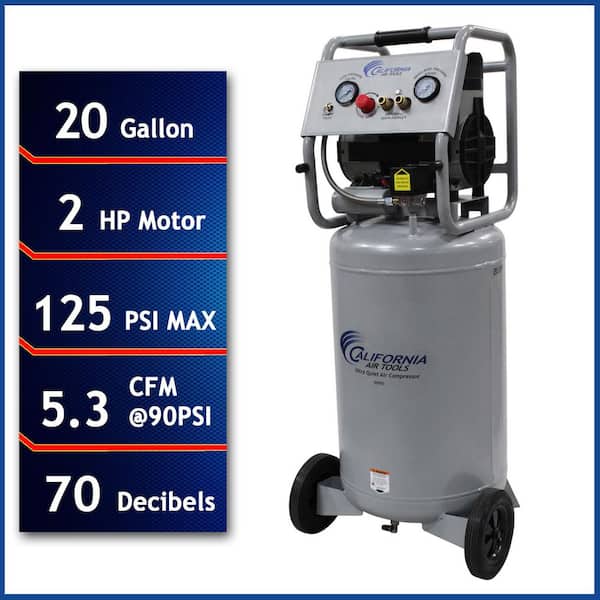
Credit: www.homedepot.com
Top Air Compressors Under $250 For Diy Detailing
Let’s look at some popular models that fit the needs of most home detailers. Prices can change, so check for deals.
1. California Air Tools Cat-1p1060s
This model is famous for being very quiet—only about 56 decibels. It has a 1-gallon tank, making it lightweight (about 29 lbs) and easy to carry. It delivers 1. 2 CFM at 90 PSI.
This compressor is best for blowing dust, drying tight spots, and running small air tools for a few seconds at a time. It’s not powerful enough for bigger tools like a Tornador for long use, but it’s perfect if you want something you can use indoors without bothering others.
Non-obvious insight: Many people overlook how much quieter this unit is compared to others. If you plan to work at night or in an apartment, this is a big benefit.
2. Bostitch Pancake Air Compressor (btfp02012)
The BOSTITCH pancake model is very popular for home use. It has a 6-gallon tank and delivers 2. 6 CFM at 90 PSI. This is enough for most detailing tasks, including short bursts with a Tornador.
It weighs about 29 lbs and is shaped to be stable on the floor. The noise level is about 78 dB, which is typical for its size. It starts quickly even in cold weather and is oil-free, meaning less maintenance.
Practical example: You can use this compressor to clean floor mats, blow out cracks, and even run a small die grinder for cleaning rust.
3. Porter-cable C2002
This is another popular “pancake” style compressor. It has a 6-gallon tank, delivers 2. 6 CFM at 90 PSI, and runs at about 82 dB. The design is very similar to the BOSTITCH, but some users say the regulator knob is a bit cheaper.
Still, it’s reliable for most car cleaning jobs.
Extra tip: Always drain the tank after each use to prevent rust and keep your compressor working longer.
4. Dewalt Dwfp55126
This model is a bit more expensive but often found under $250. It offers a 6-gallon tank, 2. 6 CFM at 90 PSI, and a high-efficiency motor for easier cold starts. The noise is about 75 dB, making it quieter than most pancake compressors.
DEWALT is known for durability and good customer support. It’s a smart choice if you plan to use your compressor for other DIY jobs, like inflating tires or powering nail guns.
5. Campbell Hausfeld Portable Quiet Air Compressor (dc060500)
This unit is designed to be much quieter (68 dB) than most similar-sized compressors. It has a 6-gallon tank and delivers about 2. 4 CFM at 90 PSI. It’s a bit heavier (62 lbs), but it has wheels and a handle for moving around.
If you want a quieter work environment and plan to do longer cleaning sessions, this is a good option. The extra weight comes from better sound insulation.
Non-obvious insight: Quieter compressors let you hear your music or instructions while working, which can make detailing more enjoyable.
Common Mistakes When Choosing A Compressor
It’s easy to make mistakes when picking your first compressor. Here are some things to avoid:
- Focusing only on max PSI: High PSI doesn’t mean the compressor can deliver enough air for your tools. Check the CFM rating at 90 PSI.
- Buying too small: A 1-gallon or 2-gallon tank empties quickly if you use air tools for more than a few seconds. This means the motor runs constantly, which can wear it out.
- Ignoring noise levels: Many compressors are much louder than people expect. If you have sensitive ears or close neighbors, choose a quiet model.
- Not checking power supply: Make sure you have a safe, grounded outlet in your work area. Extension cords can reduce performance and overheat.
- Skipping maintenance: Even oil-free compressors need to have their tanks drained to prevent rust and water damage.
How To Use Your Air Compressor For Detailing
Getting the most from your compressor is not just about buying the right one. Here’s how to use it well for different detailing jobs.
Blowing Out Cracks And Vents
- Attach a blow gun or nozzle to the hose.
- Set the pressure to around 40–60 PSI (enough to move dust, but not so strong it damages plastic).
- Blow out air vents, seat rails, cup holders, and door pockets. Hold the nozzle a few inches away.
- Wear safety glasses—dust can fly into your eyes.
Drying Wet Surfaces
- After shampooing carpets or seats, use the air compressor to blow dry hard-to-reach spots.
- Move the nozzle slowly to avoid pushing water deeper into the fabric.
- Open car doors or windows for airflow.
Using A Tornador Cleaning Gun
- Connect the Tornador to your compressor. It works best with at least 2.5 CFM at 90 PSI.
- Fill the Tornador with your favorite interior cleaner.
- Spray and scrub dirty areas like door panels, cup holders, or rubber mats.
- Wipe dry after cleaning.
Inflating Tires And Accessories
- Set the compressor to the correct PSI for your tires (check your car’s manual).
- Use a tire inflator attachment with a gauge for accuracy.
- Don’t overinflate—stop and check pressure often.
Running Small Pneumatic Tools
- For tools like a mini polisher, check the air requirements (often 2–4 CFM).
- Run the tool in short bursts to avoid emptying the tank too quickly.
- If your tool slows down or stops, let the compressor refill before continuing.
Practical Tips For Better Results
- Use a long hose: This lets you move around the car without dragging the compressor.
- Keep the compressor off painted surfaces: The vibration can cause scratches if it moves.
- Check connections for leaks: Air leaks waste power and lower performance. Use Teflon tape on threaded fittings if needed.
- Store indoors: Cold or damp garages can cause moisture to build up inside the tank.
- Drain the tank after every use: This prevents rust and keeps your compressor lasting longer.
Non-obvious insight: If you use your compressor a lot, consider adding a water trap or filter to the air line. This keeps water from spraying onto your car’s interior.
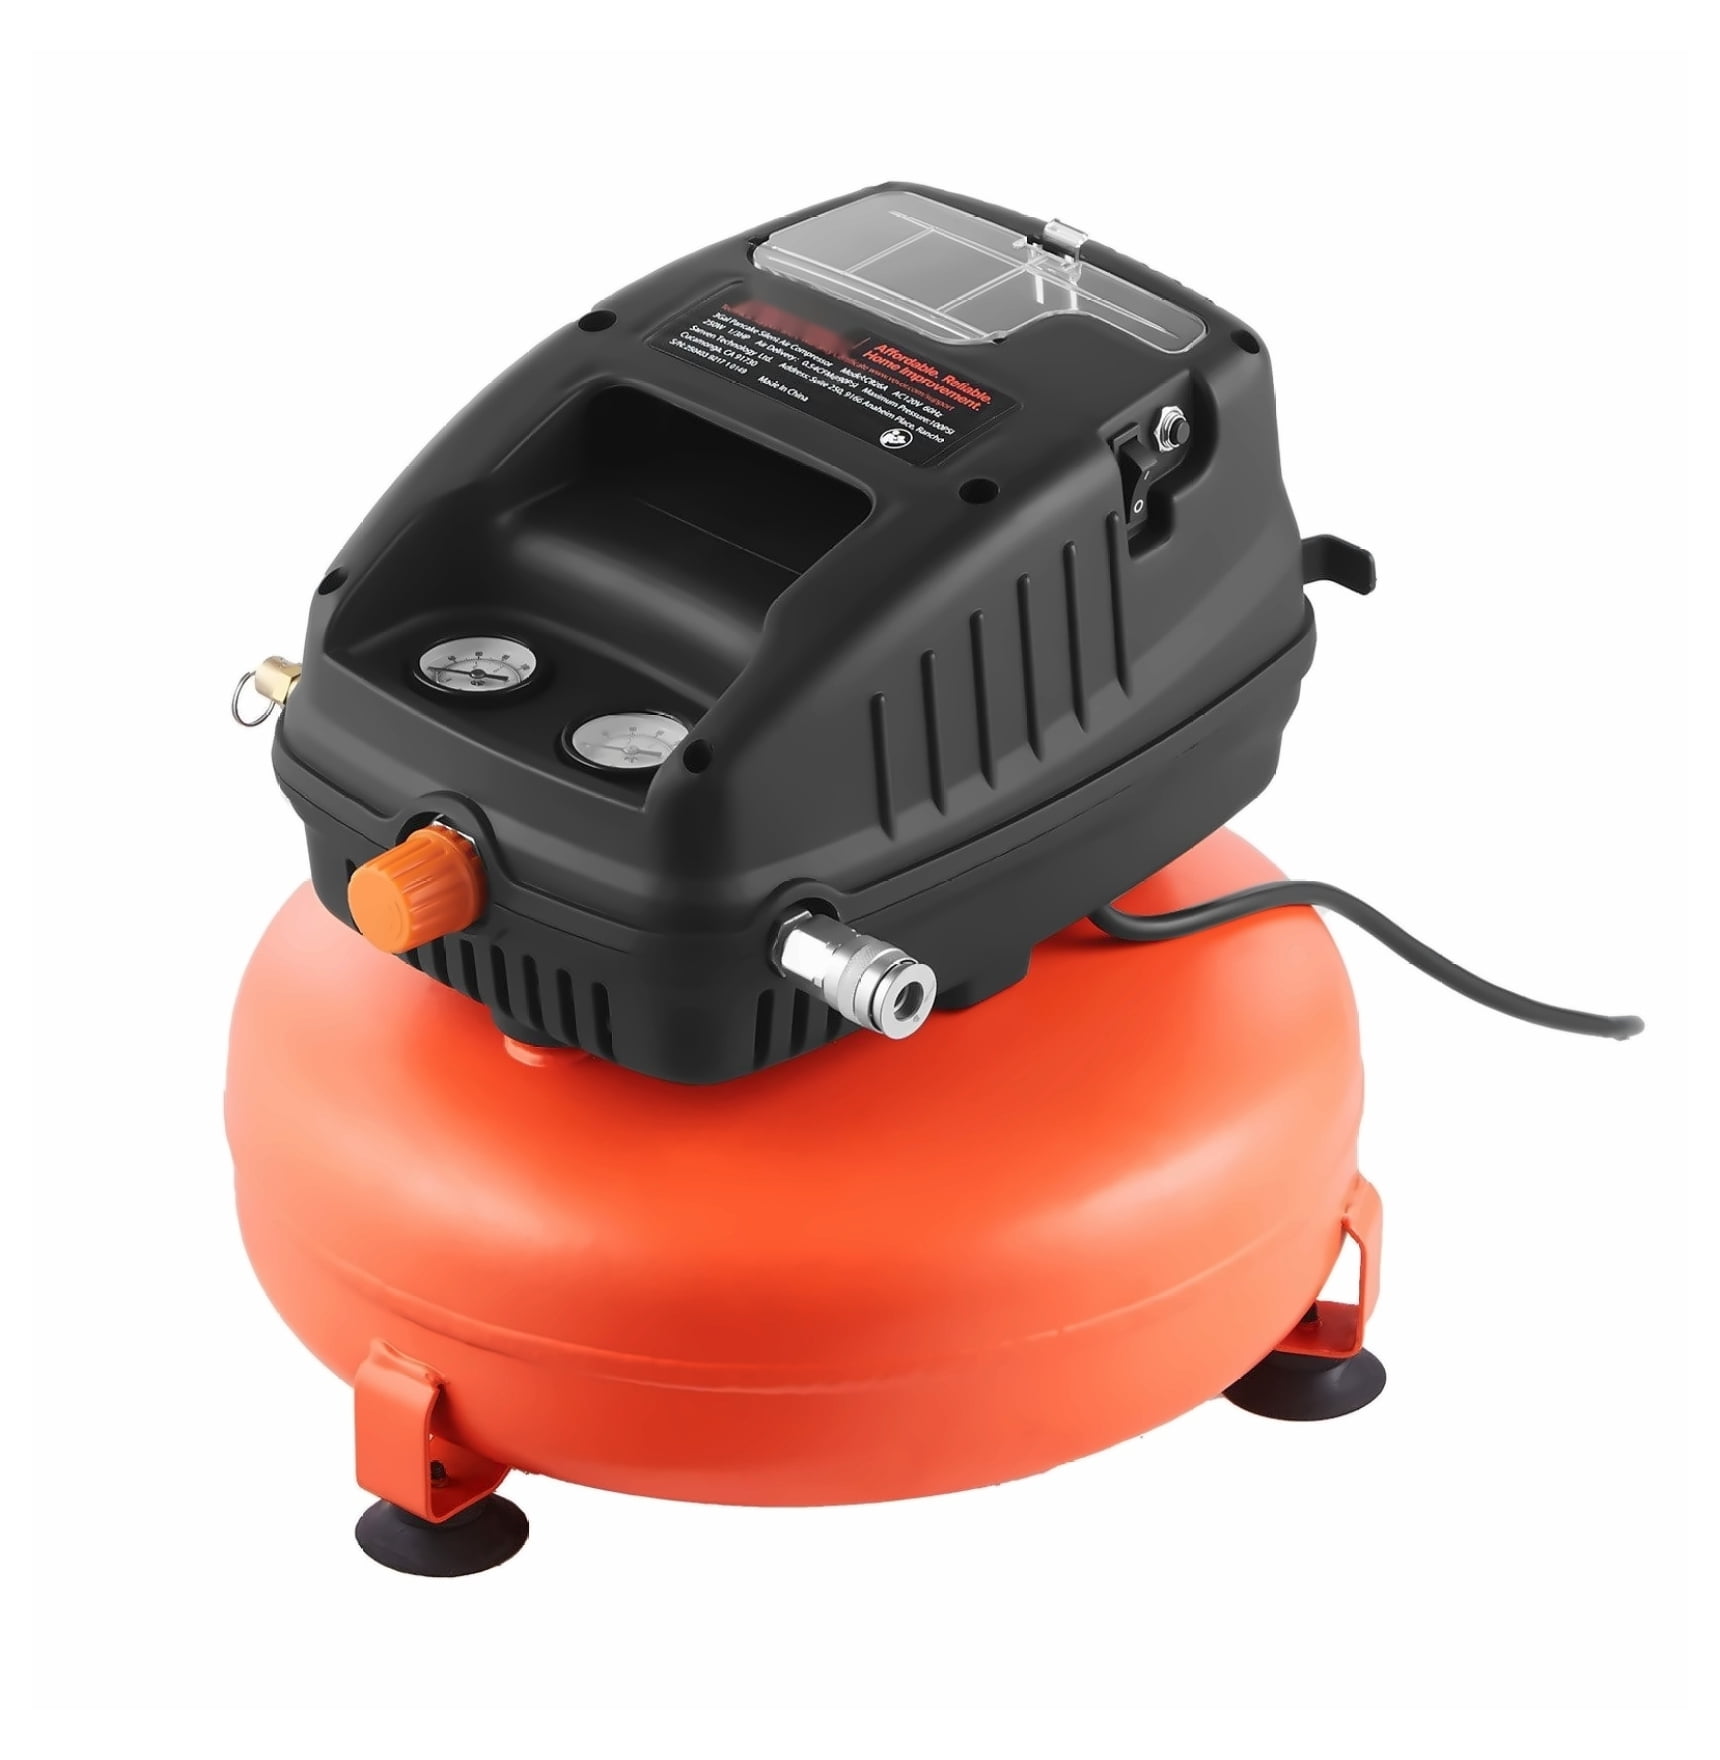
Credit: www.homedepot.com
Accessories That Make Detailing Easier
You can get even more out of your compressor with a few simple add-ons:
- Blow Gun with Rubber Tip: Soft tips protect delicate surfaces.
- Detailing Brush Attachment: Some brushes connect to the blow gun for deep cleaning.
- Flexible Air Hose: Lightweight hoses (like polyurethane) are easier to handle.
- Quick-Connect Couplers: These let you swap tools quickly without leaks.
- Inline Filter: Stops dust, oil, and water from reaching your tools or car.
Practical example: A blow gun with a rubber tip can clean between seat cushions without scratching leather or plastic.
When Not To Use An Air Compressor
Air compressors are great for most detailing jobs, but not for everything.
- Don’t use high-pressure air on fragile trim or old electronics. You can break small parts or push dust deeper.
- Avoid using compressed air to clean up chemical spills. This can spray dangerous chemicals into the air.
- Don’t blow air directly at yourself or others. Compressed air can cause injuries.
If you’re unsure, start with low pressure and test on a small, hidden area first.
How To Maintain Your Compressor
A well-maintained compressor will last for years. Here’s what to do:
- Drain the tank after each use: Moisture inside can rust the tank and cause leaks.
- Check the air filter monthly: Some compressors have a small filter—clean or replace it as needed.
- Inspect hoses and fittings for cracks or leaks: Replace as needed.
- Follow the manufacturer’s instructions: For oil-lubricated models, check and change the oil as directed.
- Store in a dry place: Moisture is the enemy of all compressors.
Non-obvious insight: Even oil-free compressors can build up water inside the tank. Don’t skip draining, or you might shorten its life by years.
Is It Worth Buying A Used Compressor?
Buying used can save money, but there are risks.
- Check for rust inside the tank. Ask the seller to open the drain valve—rusty water is a bad sign.
- Listen for strange noises. Grinding or knocking means the motor or pump may be failing.
- Test all controls and gauges. Broken regulators or leaking safety valves are expensive to fix.
- Check warranty status. Most warranties don’t transfer to new owners.
If you find a good deal from a trusted seller, used can be a good option, but be ready to replace worn parts.
Credit: www.walmart.com
Final Thoughts: Making The Right Choice
An air compressor can make your auto detailing projects faster, easier, and more professional. For under $250, you can find a model that handles almost any DIY cleaning task, from blowing dust to running small tools.
Remember:
- Focus on CFM, not just PSI.
- Pick a tank size that matches your needs.
- Think about noise, portability, and durability.
- Maintain your compressor, and it will serve you for years.
If you want to see more about how air compressors work or compare more models, check out this [detailed guide from Home Depot](https://www.homedepot.com/c/ab/types-of-air-compressors/9ba683603be9fa5395fab9012dd1b3a).
With the right setup and a little practice, you can get professional-level results in your own garage—without spending a fortune. Happy detailing!